When deploying a fiber network, traditional trenching methods can be expensive and time-consuming, and cause extensive disruption to the local area.
In a city, for example, streets have to be closed while they are dug up, disrupting residents, drivers and local authorities. Costs for labor, permits and restoration fees are high, adding to budgets and even making some projects uneconomic.
Micro Trenching Option for Underground Installations
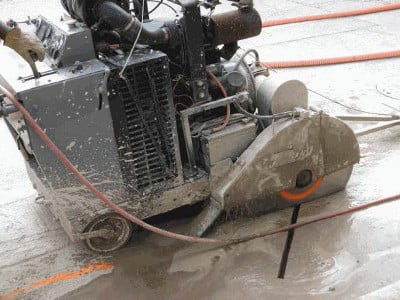
Consequently, many installers are now switching to micro trenching (also known as slot-cut trenching). This offers substantial benefits over traditional methods as it involves using a diamond circular saw to cut a 0.75 - 1.5 inch wide, 4 inch deep trench. Microduct is installed in the bottom of the trench and it is then backfilled and sealed, speeding up the project.
By comparison, traditional trenches are at least 12 inches wide, in order to fit the size of the smallest excavator buckets, and deployments take more passes to backfill. These factors combined mean that micro trenching is typically 60% cheaper than traditional excavations, as well as being much less disruptive to the urban environment.
However, as with any deployment technique, planned savings can only be realized if best practice is followed. Based on our experience of installing fiber using this method, during projects in Chicago to California, here’s our top seven tips for a successful deployment.

1. Work Within Municipality Rules and Regulations
While micro trenching causes less disruption than traditional trenching techniques, the rules and regulations set by municipalities do vary. For example, some are wary of the shallowness of micro trenches, which means that the fiber microducts are close to the surface and, therefore, vulnerable to damage.
Consequently, municipalities typically mandate where micro trenches are cut - either along the center line of the road or close to the seam where the curb and road meet. Ensure you have followed regulations and have the right permissions and permits in good time before beginning work.
2. Mark Out the Path Before you Begin
Plan ahead and check where all other services are in the area you are going to cut. Mark these on the surface of the roadway or sidewalk and also mark the route you are going to cut before you begin. This will act as a guide to follow, ensuring the cut line is straight.
3. Use the Right Equipment
In the planning process, pick the desired trench width and depth. This will be impacted by the number of microducts being installed, the type of material used in the road, and local regulations. From this, select the best equipment for the job, looking at size of the saw blade and the best machine for the project, which will depend on the distance to be cut and the required speed. Obviously, ensure that anyone operating the micro trench cutter is trained and follows all relevant health and safety regulations.

4. Follow Standard Cutting Procedures
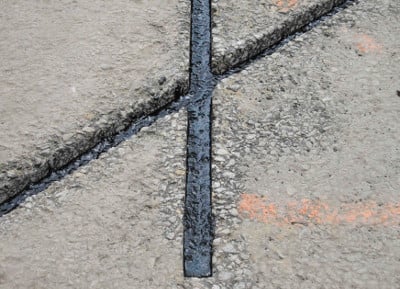
The machines used tend to cut in sweeps rather than tight corners, so plan accordingly. 90° bends can make it difficult to install fiber in the duct, so maintain a minimum bend radius of 6 inches to avoid kinking of the duct when cornering.
Connect two intersecting 90° paths with a 45° cut to help relieve pressure on the microduct. As you cut, keep checking the trench depth to ensure that it is consistent, in order to avoid bind points developing in the duct when installed.
5. Check for Debris in the Micro Trench
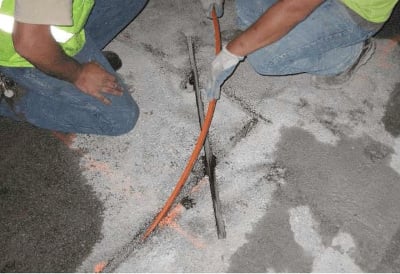
Once you have cut the micro trench ensure it is free of any debris, water, or sharp edges. The best way to do this is to clean out the slot using high pressure air or water. Remove any jagged edges as these can cause the microduct to bind during frosts, causing intermittent impacts to service. If the bottom of the slot is rough, fill it with sand to an even depth of at least 1 inch and then compact it. This also gives a flat bed for the microduct to be laid onto.
6. Place the Ducts Carefully
Lay the microduct into the slot on top of the compacted sand, making sure it is flat and firmly bedded. Use a blunt piece of wood to push it into position. If it remains twisted from the spool, simply straighten it by twisting it in the opposite direction. Secure both ends of the microduct to the jointing chamber, where they terminate. Place each microduct in the slot separately, to avoid overlap, and put a sealing plug into the end of the microduct, trapping the draw cord (if using). Ensure that at least one of the microducts (normally the uppermost one) has a tone wire to make it easy to locate after backfilling. If there is enough depth in the slot, lay an optional backer rod (polycord) on top of the microduct or sand backfill.
 7. Use High-Quality Microducts
One of the key differences between traditional and micro trenching techniques is the material used for backfill. Rather than just sand, micro trenches require additional backfill media, such as hot polymer, elasto-polymer, or grout to restore the surface. Consequently, the duct must be able to cope with the potentially high (400°F) temperatures of the restorative material.
Additionally, it has to be flexible enough to cope with corners on the route, crush resistant and sufficiently tough to cope with the pressure of the roadway above, which can reach 2900 psi. Ensure that you invest in microducts that meet all of these criteria - failures add to costs and time.
Once ducts are in place, fiber can be pulled or pushed to its destination, enabling the connection to be up and running quickly. Make good the top surface with a material that meets local road repair regulations and clear away equipment: then the deployment is complete. After restoration there will be a small, barely visible footprint that will fade over time, minimizing any aesthetic issues.
By following best practices, installers and network planners can gain all of the benefits of micro trenching, while ensuring a fast, efficient, and cost-effective deployment.


